


How to Unclog a Shower Drain: Step-by-Step Guide
Are you dealing with a slow-draining or clogged shower drain? A clogged shower drain is a common issue in most homes, often caused by a buildup of hair, soap residue, and mineral deposits. While it can be frustrating, there are many effective steps you can take to fix it yourself. As a trusted plumbing company, we’ve helped thousands of customers with drain issues, so we know what works best. Here’s a step-by-step guide on how to unclog a shower drain safely.
Common Causes of Shower Drain Clogs
Before diving into the methods, it’s helpful to know what’s causing the clog. Understanding the root problem can help prevent future issues:
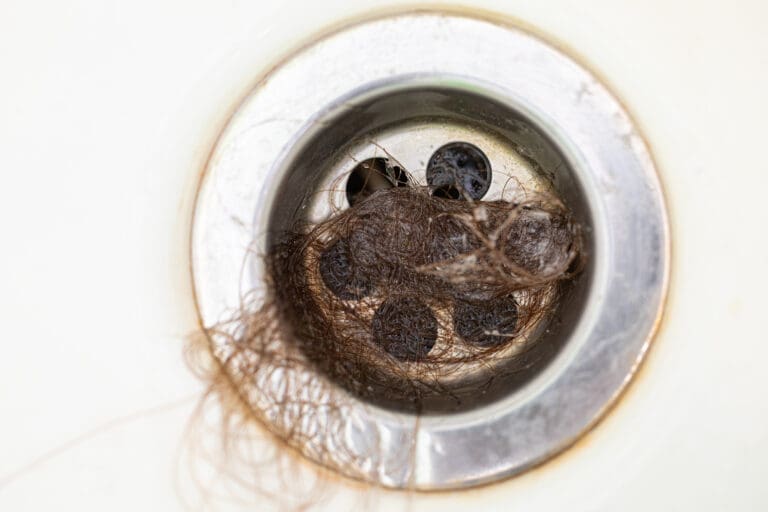
- Hair Buildup: Hair is the most common problem of clogged shower drains. It tends to build up and mix with soap residue, causing blockages.
- Soap Residue: Over time, soap, shampoo, and conditioner can form a sticky residue that clings to the pipes and traps other debris.
- Mineral Deposits: If you have hard water, minerals can accumulate in your pipes, creating clogs over time.
Tools You’ll Need to Unclog a Shower Drain
Plunger
Baking soda and vinegar
Boiling water
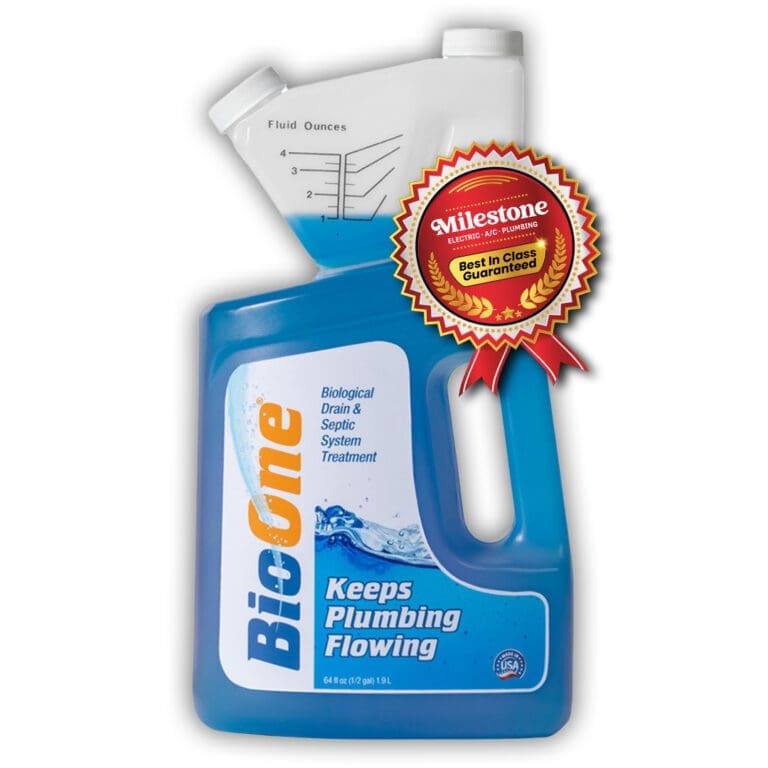
BioOne drain cleaner
Drain cover removal tool (optional)
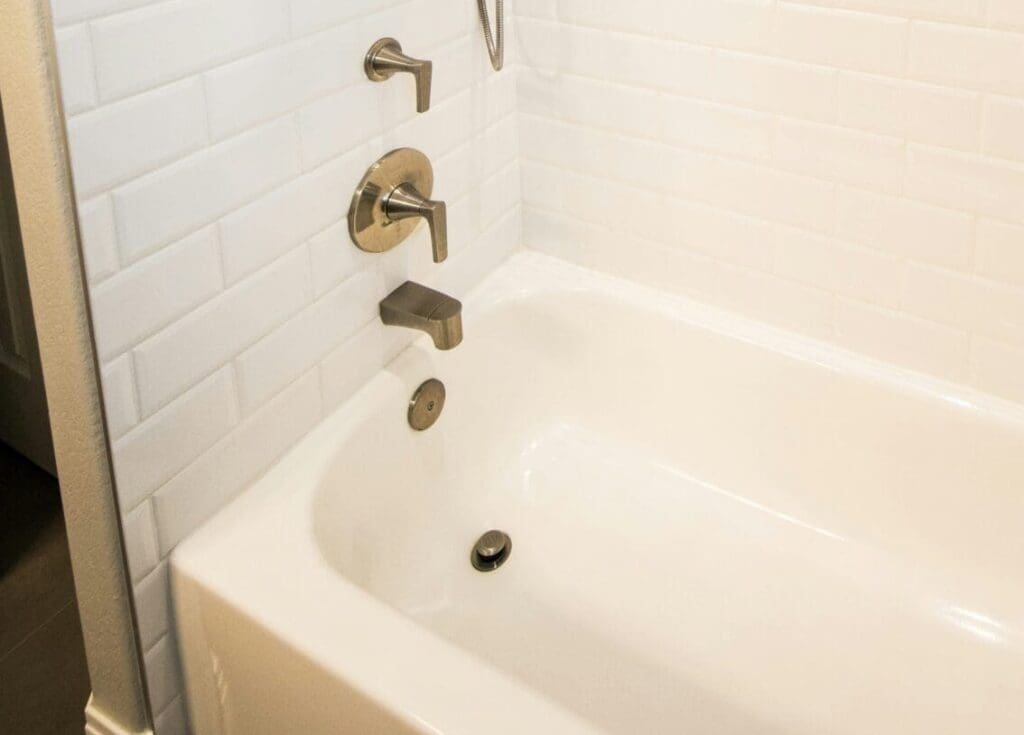
Step 1: Remove the Shower Drain Cover
Before you can get to the root of the clog, you’ll need to remove the shower drain cover. This can seem a little tricky if you’ve never done it before, but with the right approach, it’s easy to handle.
Types of Shower Drain Covers
Most homes have one of two common types of drain covers: screw-in covers or snap-in covers. Let’s go step by step on how to remove each type:
1. Screw-in Drain Cover:
Always turn the water supply off before starting a leaky faucet repair. If the fixture lacks a shutoff valve, turn off the main water supply. This step helps prevent water damage to the home.
2. Snap-in Drain Cover:
- No screws? No problem: Snap-in covers don’t have any visible screws holding them down. Instead, they rely on tension or small clips to stay in place.
- Pry it up: Use a flathead screwdriver to carefully wedge under the outer rim of the cover. Work your way around the edge, gently applying upward pressure until the cover pops free.
- Go slow and steady: Be careful not to use excessive force. You don’t want to damage the cover or scratch the surrounding area. If you feel resistance, gently wiggle the cover side to side until it loosens.
What to Do Next:
Once the cover is off, shine a flashlight into the drain to assess the clog. You may see hair or debris near the surface, which you can easily pull out using rubber gloves or tweezers. Removing this initial buildup will often resolve minor clogs right away.
Step 2: Remove Visible Blockages
Now that the drain cover is off, use gloves or tweezers to pull out any obvious debris like hair or soap debris. This simple step can often resolve the issue without needing further tools.
Step 3: Try Boiling Water
If the clog isn’t fully cleared yet, try using boiling water. Slowly pour it down the drain to help dissolve soap scum or grease buildup. Repeat this a few times if necessary.
Step 4: Use BioOne for a Safe and Effective Clean
For a natural, eco-friendly way to clear your drain, BioOne is your go-to solution. Its beneficial bacteria digest organic materials like hair and soap scum that cause clogs. Here’s how to use it:
- Pour the recommended amount of BioOne into the drain.
- Let it sit for several hours or overnight to allow the bacteria to break down the clog.
- Flush the drain with hot water.
Step 5: Use Baking Soda and Vinegar
If you prefer a chemical-free method, use baking soda and vinegar:
- Pour 1 cup of baking soda down the drain.
- Follow with 1 cup of vinegar.
- Let the mixture fizz and sit for 15-20 minutes.
- Flush with hot water to clear the drain.
Step 6: Plunge the Drain
If the clog persists, use a plunger. Ensure there’s enough water to cover the plunger’s bottom. Create a seal around the drain and plunge vigorously for about 30 seconds.
Step 7: Use a Drain Snake (Plumbing Auger)
If plunging doesn’t work, it’s time to use a drain snake:
- Insert the snake into the drain until you hit the clog.
- Rotate the snake to break up or pull out the blockage.
- Once removed, flush the drain with hot water.
Step 8: Reinstall the Shower Drain Cover
Once the clog is cleared and the drain is flowing freely, it’s time to reinstall the shower drain cover. This step is just as important as removing it, and doing it properly ensures you don’t run into future issues.
1. Clean the Cover:
Before reinstalling, take a moment to thoroughly clean the cover. Over time, soap scum, hair, and other debris can build up on the cover itself. Use a brush or cloth to scrub away any grime. This helps prevent future clogs and keeps the drain looking clean.
2. Reinstall the Cover:
- Screw-in Drain Cover:
- Line it up: Place the cover back over the drain, making sure it’s properly aligned.
- Insert the screw: Once aligned, reinsert the screw into the center hole.
- Tighten carefully: Using your screwdriver, tighten the screw until the cover is secure. Be careful not to overtighten, as this can strip the screw or make future removal difficult. The cover should sit flush with the floor.
Snap in Drain Cover:
- Align the cover: Position the snap-in cover over the drain opening.
- Press it into place: Apply firm, even pressure on the cover until it snaps back into place. You may hear or feel a slight click as the cover locks in. Double-check that it’s sitting evenly and securely over the drain.
3. Check for Stability:
Once the cover is back in place, check to make sure it’s stable. It should not wiggle or move when touched. This will help ensure that debris and hair are caught by the cover and that future clogs are less likely to occur.
Now your shower drain cover is securely reinstalled, and your drain should be flowing smoothly once again.
Step 9: Call Milestone Electric, A/C, & Plumbing for Stubborn Clogs
If you’ve tried all these methods and the clog persists, it’s time to call the plumbers at Milestone. Persistent clogs may indicate a deeper issue with your plumbing system. Our team is here to help with expert solutions to clear any drain.
Preventing Future Clogs
Once your shower drain is clear, follow these tips to keep it that way:
- Install a Drain Cover: This will catch hair and debris before it goes down the drain.
- Use BioOne Monthly: To maintain clear drains, we recommend using BioOne once a month. It keeps organic material from building up, ensuring smooth drainage.
Why BioOne Is Your Best Choice for Drain Maintenance
BioOne is an eco-friendly drain cleaner that uses natural bacteria to break down clogs. Unlike harsh chemical cleaners, it’s safe for both your pipes and the environment. We recommend using BioOne once a month to keep your drains running smoothly.
Final Thoughts: Trust the Experts at Milestone
Unclogging a shower drain is manageable with the right tools and techniques, but if you run into persistent problems, don’t hesitate to call the professionals. At Milestone, we specialize in providing fast, effective plumbing solutions. If you’re tired of dealing with clogged drains or want help maintaining your plumbing system, give us a call!
Keep Your Drains Clear with BioOne
Want to prevent future clogs? Order BioOne today from Milestone! It’s a safe, effective, and environmentally friendly way to keep your shower drain free of blockages.
We cannot wait to help you resolve your plumbing issues. Call us today at (214) 267-2405 or (817) 267-2405 to set up an appointment. You can also contact us online.